
MeetMeWorld MeetMeWorld MeetMeWorld Networking for the rest of us
  • Home
  • News
    • Fact Check
    • US News
      • US News Articles
    • World News
      • World News Articles
  • Business
    • News and Advice
      • News and Advice Articles
    • Small Business
      • Small Business Articles
    • Subscriber Business Articles
  • Sports
    • News and Analyses
      • Sports News and Analyses Articles
      • Motor Sports Aticles
    • Baseball
      • Baseball Articles
    • Basketball
      • Basketball Articles
    • Football
      • Football Articles
    • Golf
      • Golf Articles
    • Hockey
      • Hockey Articles
    • Soccer
      • Soccer Articles
    • Tennis
      • Tennis Articles
  • Entertainment
    • Celebrity News
      • Celebrity News Articles
    • Humor and Comedy
      • Humor and Comedy Articles
    • Movie News and Reviews
      • Movie News and Reviews Articles
    • Music News
      • Music News Articles
    • Theater News and Reviews
      • Theater News and Reviews Articles
    • TV News and Reviews
      • TV News and Reviews Articles
  • Hobbies and Interests
    • Antiques
      • Antiques Articles
    • Cars and Motorcycles
      • Cars and Motorcycles Articles
    • Cats and Dogs
      • Cats and Dogs Articles
    • Collectors
      • Collectors Articles
    • Cooking and Baking
      • Main Dish Articles
      • Side Dish Articles
      • Baked Goods Articles
      • Dessert Articles
      • Beverage Articles
      • Appetizer Articles
      • Sauce and Condiment Articles
      • Breakfast Dish Articles
    • Gardening and Landscaping
      • Gardening Articles
    • Needles and Thread
      • Needlepoint Articles
      • Sewing Articles
    • Needles and Yarn
      • Crochet Articles
      • Knitting Articles
      • Plastic Canvas Articles
    • Other Hobbies and Interests
      • Other Hobbies and Interests Articles
  • Crazy Games
    • About
      • Crazy Games Articles
    • Arcade Games
      • Crazy Roll 3D
      • Pinball Arcade
      • Shape Shooter
    • Card Games
      • Classic Solitaire
      • Cribbage
      • Tri Peaks Social
    • Pool Games
      • 8 Ball Billiards
    • Puzzle Games
      • Cups
      • Pipes
      • Blocks
      • Block Buster
      • City Blocks
      • Diamond Dungeon Match
      • Mystery Forest Match
    • Racing Games
      • Super MX
      • Super Star Car
      • Super Trucks Offroad
      • 4 x 4 Offroad
    • Word Games
      • Word Search
      • Word Swipe
      • Words of Wonder
  • About Us
    • About Us
    • Contact Us
    • ChatRoom Request
    • Help Articles
    • Policies
  1. You are here:  
  2. Home
  3. Subscriber Articles
  4. Hobbies and Interests Articles
  5. Dessert Articles

Chocolate Peanut Butter Dream Bars
Details
Lorie Kennedy logo
Dessert Articles
Hits: 3278

Share on Social Media

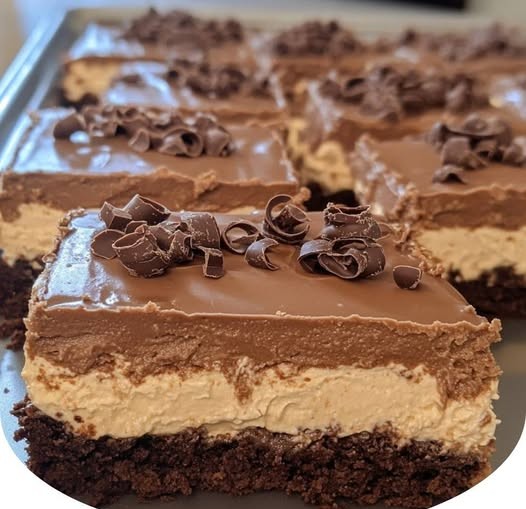
Chocolate Peanut Butter Dream Bars

Ingredients 

For the Crust:

  • 1½ cups graham cracker crumbs (or vanilla wafer crumbs)
  • ½ cup unsalted butter, melted
  • ¼ cup granulated sugar
 

For the Peanut Butter Layer:

  • 1 cup creamy peanut butter
  • 1 cup sweetened condensed milk
  • 1 teaspoon vanilla extract
 

For the Chocolate Topping:

  • 1 cup semi-sweet chocolate chips
  • 2 tablespoons unsalted butter
  • 1–2 tablespoons heavy cream (optional, for smoother texture)
 

Optional Add-Ins:

  • ½ cup crushed peanuts or peanut butter chips
  • ¼ cup mini marshmallows (for a Reeses-like crunch)
  • 1 teaspoon salt (to balance sweetness)
 

Step-by-Step Instructions

Step 1: Prepare the Crust

In a mixing bowl, combine the graham cracker crumbs , melted butter , and sugar until well mixed. The mixture should resemble wet sand and hold together when pressed.


Press the crust firmly into the bottom of an 8x8-inch baking pan (lined with parchment paper for easy removal). Set aside.


Step 2: Make the Peanut Butter Filling

In a microwave-safe bowl, combine the peanut butter , condensed milk , and vanilla extract . Microwave in 30-second bursts, stirring between each interval, until smooth and creamy. Alternatively, melt the ingredients over low heat on the stovetop.


Pro Tip: Use a hand mixer to ensure the mixture is ultra-smooth and well combined.


Step 3: Add Crunchy Mix-Ins (Optional)

If using crushed peanuts or peanut butter chips , stir them into the peanut butter mixture now for added texture. Spread the filling evenly over the crust in the pan.


Step 4: Create the Chocolate Layer

In a separate microwave-safe bowl, melt the chocolate chips and butter together in 30-second intervals, stirring between each interval. Add heavy cream if you want a smoother, shinier chocolate coating.


Pour the melted chocolate over the peanut butter layer, spreading it evenly with a spatula. For a glossy finish, refrigerate the pan for 5–10 minutes to slightly thicken the chocolate before proceeding.


Step 5: Chill and Set

Refrigerate the pan for at least 2–3 hours , or until the chocolate is fully set. For best results, chill overnight.


Step 6: Slice and Serve

Once set, lift the bars out of the pan using the parchment paper overhang. Slice into squares and serve chilled. Store leftovers in an airtight container in the refrigerator for up to 1 week.


Customization Ideas

While the classic version of these bars is divine, here are some ideas to switch things up:

 
  1. Nutty Crunch : Add crushed pecans, almonds, or hazelnuts to the crust or filling.
  2. Salted Caramel Twist : Drizzle caramel sauce over the peanut butter layer before adding chocolate.
  3. Double Chocolate : Use both milk and dark chocolate for the topping layer.
  4. Candy Add-In : Stir in crushed candy-coated peanuts (e.g., M&Ms or Reese’s Pieces) into the chocolate layer.
 

Tips for Success

  • Crush the Cookies Properly : Use a food processor or ziplock bag and rolling pin to ensure even crumbs.
  • Avoid Overmixing : Stir the peanut butter mixture just until smooth to prevent overworking.
  • Use Quality Chocolate : Dark or semi-sweet chocolate chips provide the best melt and flavor.
  • Adjust Sweetness : Reduce sugar in the crust if using naturally sweet peanut butter or condensed milk.
No Bake Cookies

Details
Lorie Kennedy logo
Dessert Articles
Hits: 3683

Share on Social Media

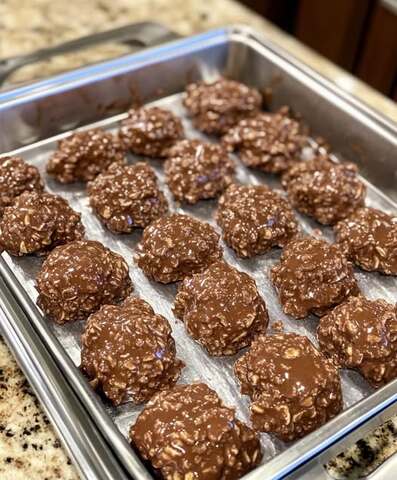
No Bake Cookies

Ingredients:

  • 2 cups granulated sugar
  • 1/2 cup milk
  • 1/2 cup unsalted butter
  • 1/4 cup unsweetened cocoa powder
  • 3 cups quick-cooking oats
  • 1/2 cup peanut butter
  • 1 teaspoon vanilla extract

Directions:

In a medium saucepan, combine the sugar, milk, butter, and cocoa powder.

Bring to a boil over medium heat, stirring constantly. Once boiling, let cook for 1 minute, then remove from heat.

Stir in the peanut butter and vanilla extract until smooth, then fold in the oats until well coated.

Drop spoonfuls of the mixture onto parchment paper-lined baking sheets.

Allow the cookies to set at room temperature until firm, about 30 minutes.

Once set, the cookies can be stored in an airtight container at room temperature.

Enjoy these quick and easy no-bake cookies, perfect for a last-minute treat without turning on the oven.

Ube Hopia 

Details
Lorie Kennedy logo
Dessert Articles
Hits: 3686

Share on Social Media

Ube Hopia 
Flour Dough:
256g APFlour
Pinch of Salt
125ml Water, room temp
125ml Cooking Oil
Butter Dough:
192g APFlour
100g White Sugar
113g Butter, room temp
600g Ube Filling
1. Combine flour dough ingredient in a bowl just until it becomes a dough. Cover and chill in fridge.
2. Combine butter dough ingredients until wet sand texture then cover and chill in fridge.
3. Portion your ube filling to 25g each ball.
4. Combine Flour/Butter Dough and knead together until just combined. Be careful not to overmix.
5. Portion to 24pcs each.
6. Cover filling with dough. Use cookie cutter to shape.
7. Chill for atleast an hour.
8. Fry without oil. Dont forget to fry the sides as well.
9. Serve slightly warm or completely cool down.

Creamy-Peanut-Butter-Fudge

Details
Lorie Kennedy logo
Dessert Articles
Hits: 3535

Share on Social Media

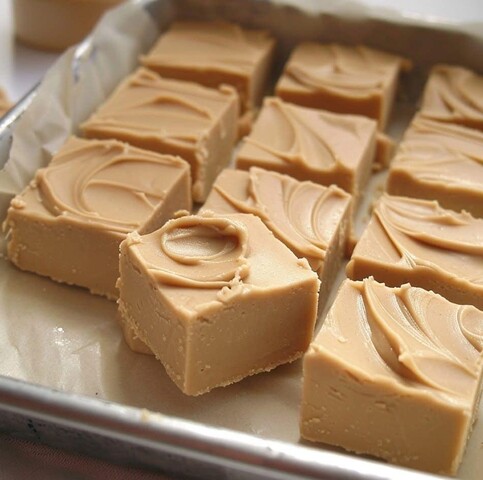
Creamy-Peanut-Butter-Fudge
Ingredients
½ cup unsalted butter
2 cups light brown sugar
5 ounces half & half
1 cup creamy peanut butter
2 teaspoons vanilla extract
3 cups powdered sugar
Instructions
Line an 8×8-inch baking pan with parchment paper and set aside.
Add the powdered sugar to a large mixing bowl and set aside.
In a medium-sized saucepan over medium heat, melt the butter. Then stir in the brown sugar and milk and bring it to a boil. Once boiling, allow to sit untouched for 1 minute and 45 seconds.
Remove from heat, then stir in the peanut butter and vanilla extract until smooth and creamy.
Pour the hot peanut butter mixture into the bowl with the powdered sugar, then beat with an electric mixture until completely smooth. Pour into the prepared pan and let sit until completely cooled and set.

Blueberry Fluffy Cottage Cheese Cloud Bread 

Details
Lorie Kennedy logo
Dessert Articles
Hits: 3422

Share on Social Media

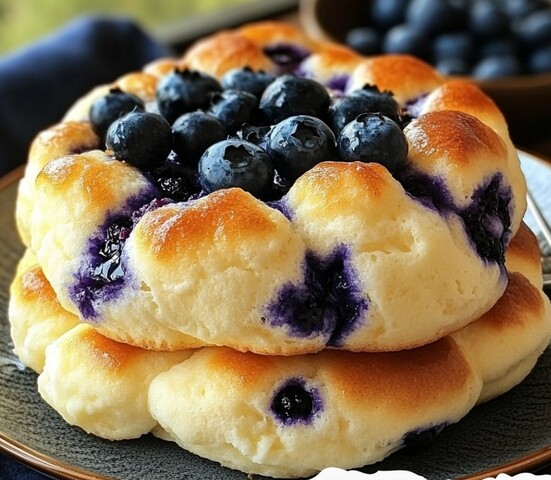
Blueberry Fluffy Cottage Cheese Cloud Bread 
Ingredients:
3 large eggs, separated
½ cup cottage cheese, blended until smooth
¼ teaspoon cream of tartar
½ teaspoon salt
1 tablespoon cornstarch or arrowroot powder (optional, for added structure)
1 teaspoon honey or a pinch of sweetener (optional)
¼ cup fresh or frozen blueberries
Directions:
Preheat oven to 300°F (150°C) and line a baking sheet with parchment paper.
In a clean, dry bowl, beat the egg whites and cream of tartar with an electric mixer until stiff peaks form.
In a separate bowl, whisk together the egg yolks, blended cottage cheese, salt, cornstarch (if using), and honey or sweetener.
Gently fold the egg white mixture into the cottage cheese mixture in three additions, being careful not to deflate the batter.
Spoon the mixture onto the prepared baking sheet, forming 4-6 round cloud-like shapes.
Lightly press a few blueberries into each bread round.
Bake for 25-30 minutes, or until golden brown and set.
Let cool slightly before serving. Enjoy warm or at room temperature!
Prep Time: 10 minutes | Cooking Time: 30 minutes | Total Time: 40 minutes
Kcal: 90 kcal | Servings: 6 cloud breads
Tips:
For extra fluffiness, make sure the egg whites are whipped to stiff peaks.
Store in an airtight container in the fridge and reheat in a toaster oven for the best texture.

More Articles …

  1. Cinnamon Sugar Pizza made with Crescent Rolls
  2. No-Bake Millionaire Pie
  3. Jolly Rancher Candy Apples 
  4. Homemade Butter Mints
Page 7 of 15
  • Start
  • Prev
  • 2
  • 3
  • 4
  • 5
  • 6
  • 7
  • 8
  • 9
  • 10
  • 11
  • Next
  • End

Privacy Policy
Acceptable Use Policy
Disclaimer

© Copyright 2009 - 2025 www.meetmeworld.net. All Rights Reserved.